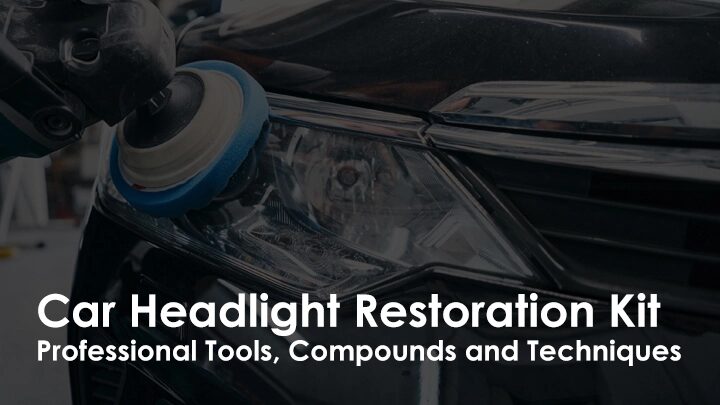
A car headlight restoration kit is not always a single boxed product. Professional detailers often select a combination of a mini dual-action (DA) polisher, sanding abrasives, cutting and finishing compounds, polishing pads, microfiber cloths and a suitable protective system. The right combination depends on the condition of the lens and the restoration method.
Cloudy, yellow and scratched headlights can affect a vehicle’s appearance and may reduce light output when the lens surface is responsible for poor light transmission. For professional car detailers, headlight restoration is a useful service that can improve the appearance of suitable headlight lenses without replacing the entire headlight assembly.
In this guide, we explain how to select headlight restoration tools, choose the right sanding grits, use polishing compounds and understand the importance of protecting the restored lens. We also cover products available from AutoFresh for professional detailing applications.
What Is a Car Headlight Restoration Kit?
A car headlight restoration kit is a collection of tools and consumables used to improve the appearance of cloudy, oxidized or surface-damaged headlight lenses. Professional detailers may build a setup according to the condition of the lens, the type of damage and the finish required.
A professional headlight restoration setup may include:
- A compact DA polisher for controlled machine polishing.
- Abrasive sanding discs and waterproof sandpaper for suitable surface correction.
- Heavy-cut compound for refining appropriate sanding marks.
- Finishing compound for improving surface clarity.
- Compatible wool, heavy-cut, medium-cut and fine-polishing pads.
- A compatible backing plate and interface pad where required.
- Clean microfiber cloths for residue removal and final inspection.
- A suitable UV-resistant headlight protection system.
Not every job requires every item. Light surface haze may need a less aggressive approach than severe oxidation or a deteriorated outer coating. Inspect the lens before choosing the process.
Headlight restoration is not suitable for every type of damage. Cracks, severe internal condensation, damaged reflectors and internal lens deterioration may require specialist repair or headlight replacement.
Why Do Car Headlights Become Cloudy or Yellow?
Many modern vehicle headlights use polycarbonate plastic lenses. This material is lightweight and impact-resistant, but the outer surface can deteriorate with age and environmental exposure.
- UV exposure: Sunlight can degrade the outer protective coating and contribute to yellowing or oxidation.
- Surface oxidation: Deterioration of the outer surface can create a dull, cloudy or uneven appearance.
- Road contamination: Dirt, traffic film and other contaminants can accumulate on the lens.
- Scratches and pitting: Surface marks can affect the appearance of the lens and scatter light.
- Previous restoration damage: Aggressive sanding, unsuitable polishing techniques or inadequate protection can cause uneven results or faster deterioration.
Before starting, determine whether the problem is on the outside or inside the headlight. Exterior sanding and polishing will not fix internal condensation, damaged reflectors or deterioration inside a sealed headlight assembly.
Essential Tools for Professional Headlight Restoration
1. Mini DA Polisher
A compact dual-action polisher can help detailers work on the smaller and curved surfaces of headlight lenses. Its orbital movement supports controlled polishing when the correct pad, pressure and technique are used.
The ShineMate EX603 3-inch, 12 mm Mini DA Polisher is an option for professional detailing setups. Its compact design is useful for smaller working areas that may be difficult to access with a full-size polisher.
Use a compatible backing plate and pad, follow the machine instructions and work in controlled sections. Avoid excessive pressure and prolonged polishing in one spot. Monitor surface temperature, particularly when working on plastic lenses.
2. Backing Plate and Interface Pad
The backing plate connects a compatible polishing pad or sanding attachment to the machine. The ShineMate Backing Plate for DA / Orbital Polisher can be considered for compatible setups.
An interface pad may provide additional flexibility between the backing plate and an abrasive disc when the sanding system calls for one. The ShineMate 3-inch Interface Pad is one available option.
Always check the attachment system, disc diameter and machine compatibility before use. Do not add an interface pad unless it is appropriate for the selected abrasive and procedure.
3. Headlight Sanding Discs and Abrasive Sheets
Sanding is used when cleaning and polishing alone cannot remove suitable surface oxidation or defects. It helps level the damaged surface and prepares it for subsequent polishing.
AutoFresh offers several abrasives that may be used in professional detailing workflows:
- Napoleon P600 3-inch Headlight Sanding Discs
- Napoleon P800 3-inch Headlight Sanding Discs
- Napoleon Waterproof Abrasive Sheets
- Starcke 1500-Grit Velcro Sanding Discs
- Starcke 2000-Grit Velcro Sanding Discs
- Starcke 3000-Grit Velcro Sanding Discs
The correct abrasive depends on the lens condition and the manufacturer’s recommended process. P600 is relatively aggressive and should not be used automatically on every headlight. Starting with an unnecessarily coarse grit can remove more material than required and create deeper sanding marks.
Finer abrasives, such as P1500, P2000 and P3000, can refine the surface progressively when appropriate for the selected system. Complete each sanding stage properly before moving to the next grit.
How to Choose the Right Sanding Grit for Headlight Restoration
Select the least aggressive abrasive that can reasonably address the confirmed surface damage. The objective is to remove only as much of the damaged surface as necessary and refine the resulting marks before polishing.
| Abrasive grit | Typical role | Important consideration |
|---|---|---|
| P600 | More aggressive surface correction | Use only when the condition and process justify it. |
| P800 | Coarse correction in suitable procedures | Requires further refinement before finishing. |
| P1500 | Intermediate surface refinement | Follow the recommended sanding sequence. |
| P2000 | Finer sanding and mark refinement | Remove the previous stage’s marks adequately. |
| P3000 | Fine finishing preparation | Prepare the surface for the selected polishing system. |
These are general descriptions, not a universal sanding sequence. Abrasive performance varies with the product, backing, pressure, lubrication and lens condition. Inspect the surface under good lighting between stages and follow the abrasive manufacturer’s instructions for wet or dry use.
Choosing the Right Headlight Polishing Compound
After sanding, the lens may look dull because the abrasive has created fine surface marks. A suitable polishing compound and pad combination can refine those marks and improve clarity when the surface has been prepared correctly.
Menzerna 400 Heavy Cut Compound
Menzerna 400 Heavy Cut Compound is intended for heavy-cut polishing applications. It may be considered for an appropriate cutting stage after the lens has been sanded to a suitable level.
The required cutting power depends on the sanding marks, pad selection and condition of the lens. Do not assume that a heavy-cut compound can safely remove marks left by every abrasive grit. If the marks are too deep, further controlled refinement may be required.
Check the manufacturer’s instructions and confirm suitability for the plastic lens and restoration process before use.
Menzerna 3000 Final Finish Compound
Menzerna 3000 Final Finish Compound is a finishing option that can be considered when the surface requires additional refinement after cutting.
The final result depends on surface preparation, pad condition, machine technique and compound compatibility. A finishing compound cannot compensate for deep sanding marks that were not properly refined earlier.
Inspect the lens under direct lighting from different angles. Check for remaining haze, sanding marks, compound residue and uneven areas before proceeding to protection.
How to Select the Right Polishing Pad
The pad influences how a compound works against the surface. More aggressive pads may increase correction, while finer polishing pads are generally used to refine the finish. Select pads according to the compound, machine and lens condition.
DETAILMAX Wool Cutting Pad High Nap
The DETAILMAX Wool Cutting Pad High Nap is an option for compatible cutting applications. Wool and foam pads can behave differently, so confirm that the pad is suitable for the selected machine and process.
ShineMate T120 Heavy Cut Foam Pad
The ShineMate T120 Heavy Cut Foam Pad is intended for heavy-cut polishing applications. It may be considered when the correction requirements call for a more aggressive pad and the compound is compatible.
ShineMate T60 Medium Cut Foam Pad
The ShineMate T60 Medium Cut Foam Pad may be useful when an intermediate level of correction is appropriate for the chosen compound and surface.
DETAILMAX Fine Polishing DA Pad
The DETAILMAX Foam Fine Polishing DA Pad is an option for the finishing stage when compatible with the compound and machine.
Do not choose a pad by colour alone. Check the product specifications and intended use. Also verify the backing plate and pad dimensions before assembly. A 4-inch pad should not be forced onto an incompatible 3-inch backing plate.
Step-by-Step Headlight Restoration Process for Detailers
The following is a general workflow for suitable exterior headlight restoration. The exact method must be adjusted to the lens condition, abrasive system, polishing products and protective coating selected.
Step 1: Inspect the Headlight
Check whether the damage is on the external lens surface. Look for oxidation, yellowing, scratches, pitting, cracks, internal moisture and signs of previous repair.
If the lens is cracked or the damage is internal, sanding and polishing may not be the correct solution.
Step 2: Clean the Surface
Wash the headlight to remove loose dirt and road contamination. Use compatible cleaning products and clean materials. If additional decontamination is necessary, select a method suitable for the lens and follow the product instructions.
Step 3: Mask the Surrounding Paint
Apply suitable automotive masking tape around the headlight to protect the adjacent paint, trim and seals. Check the masking before using abrasives or a machine polisher.
Step 4: Select the Starting Abrasive
Choose the least aggressive abrasive that can reasonably address the confirmed surface damage. A lightly hazed lens may need a different approach from a heavily oxidized lens.
Use coarse abrasives such as P600 or P800 only when the lens condition and restoration procedure justify them.
Step 5: Sand in a Controlled Sequence
Work in manageable sections and use the recommended sanding method. When progressive sanding is required, complete each stage before moving to the next. Inspect the surface to ensure that the previous abrasive marks have been refined.
Avoid excessive pressure, prolonged work in one spot and unnecessary material removal. Follow the abrasive manufacturer’s instructions for wet or dry use.
Step 6: Inspect Before Polishing
Clean away sanding residue using a compatible method. Inspect the surface under good lighting for deep scratches, uneven sanding patterns and missed areas. Do not proceed until the sanding marks are suitable for the selected polishing system.
Step 7: Polish with a Suitable Cutting Compound
Use a compatible compound and pad for the lens condition. Menzerna 400 Heavy Cut Compound may be considered for an appropriate cutting application. Work in controlled sections and monitor the surface temperature.
Keep the pad clean, avoid excessive pressure and follow the compound and machine manufacturer’s recommendations.
Step 8: Refine the Finish
Where required, use a suitable finishing compound and pad. Menzerna 3000 Final Finish Compound and a compatible fine-polishing pad may be considered for this stage.
Inspect the lens under direct lighting for haze, remaining sanding marks, residue and uneven clarity.
Step 9: Prepare the Surface for Protection
Before applying a protective coating, remove polishing residue and prepare the surface according to the coating manufacturer’s instructions.
The DETAILMAX 1000ml Prewipe V2 Precoat Cleaner may be considered only if its instructions confirm compatibility with the particular lens and protection system. Do not assume that every precoat cleaner is suitable for every plastic surface or coating.
Step 10: Apply Suitable UV Protection
Restoration may remove or alter the original outer protective layer. Polishing alone does not guarantee long-term resistance to UV exposure.
Apply a protective system specifically suitable for the lens material and restoration process. Follow its instructions for application, curing, handling and exposure to water. Do not substitute a general paint protection product for a dedicated headlight protection system unless the manufacturer confirms compatibility.
Step 11: Perform a Final Inspection
Inspect both headlights for consistent appearance, remaining defects and residue. Check the surrounding paint and trim, remove masking carefully and ensure that the finished surface is clean.
If poor night-time visibility was the reason for restoration, explain that polishing cannot correct faulty bulbs, damaged reflectors, incorrect beam alignment or internal headlight damage. These issues should be checked separately.
Common Headlight Restoration Mistakes to Avoid
- Starting with an unnecessarily coarse grit: This can remove more material than required and create deeper sanding marks.
- Skipping sanding stages: Moving to a finer grit too early can leave visible scratches after polishing.
- Using an incompatible pad or backing plate: Incorrect combinations can affect machine control and increase the risk of damage.
- Applying excessive pressure: Too much pressure or prolonged polishing in one spot can cause localised heat buildup.
- Polishing before refining the sanding marks: The compound may not remove deep marks effectively or safely.
- Ignoring internal damage: Exterior restoration cannot repair cracks, internal condensation or damaged reflectors.
- Skipping suitable UV protection: The restored lens may deteriorate again without appropriate protection.
- Using incompatible cleaners: Some chemicals can damage plastic or interfere with coating adhesion.
How Long Does Headlight Restoration Last?
The durability of headlight restoration depends on the original lens condition, the amount of surface damage, the restoration method and the protective system applied afterwards. Sunlight, weather, environmental contamination and vehicle storage conditions can also affect the result.
A suitable UV-resistant protective system can help maintain the restored finish. However, no restoration process should be described as permanent without supporting evidence for the specific product and conditions.
For professional detailers, recording the condition before restoration, the process used and the protective product applied helps set realistic customer expectations.
When Should a Headlight Be Replaced Instead of Restored?
Headlight restoration is most appropriate when the main problem is suitable external surface deterioration. Repair or replacement may be necessary when the headlight has:
- Cracks or significant structural damage.
- Severe internal condensation or water ingress.
- Damaged internal reflectors or lighting components.
- Internal lens deterioration that cannot be corrected externally.
- Damage that makes safe and effective restoration impractical.
If visibility remains poor after exterior restoration, the vehicle’s lighting system should be inspected. Headlight restoration is not a substitute for checking bulb performance, beam alignment or internal damage.
Choose Headlight Restoration Products from AutoFresh
Choosing the right products begins with understanding the lens condition and the process required. AutoFresh offers detailing tools and consumables that can form part of a professional headlight restoration setup, including a compact ShineMate DA polisher, Menzerna polishing compounds, sanding abrasives, compatible pads and microfiber products.
Detailers should select products according to their intended use, compatibility and the requirements of the job rather than purchasing every item in a list.
Explore detailing products at AutoFresh to find tools and consumables for your workshop.
Learn Professional Headlight Restoration at AutoFresh
Professional headlight restoration requires more than knowing which compound to use. Detailers need to understand lens inspection, abrasive selection, sanding refinement, machine control, pad and compound combinations, and suitable surface protection.
AutoFresh has its own training centre where car detailers can learn about headlight restoration. Practical training can help detailers develop their understanding of the tools, techniques and processes involved in this service.
Explore AutoFresh detailing training or contact AutoFresh for information about available training options.
Frequently Asked Questions
What is the best car headlight restoration kit for professional detailers?
The right setup depends on the lens condition and restoration method. A professional setup may include a compact DA polisher, compatible abrasives, cutting and finishing compounds, suitable pads, microfiber cloths and a compatible UV-resistant protective system.
Which sandpaper grit is used for headlight restoration?
The starting grit depends on the severity of the surface damage and the manufacturer’s recommended process. Coarse abrasives such as P600 require particular care, while finer abrasives such as P1500, P2000 and P3000 can be used for progressive refinement when appropriate.
Can a DA polisher be used for headlight restoration?
A compatible DA polisher can be used for suitable headlight sanding and polishing processes. The machine, backing plate, pad and abrasive must be compatible with the procedure. Controlled technique and surface-temperature monitoring are important.
What is the difference between cutting compound and finishing compound?
A cutting compound is intended for more aggressive correction, while a finishing compound is used to refine the surface appearance after the earlier correction stages. The result depends on the compound, pad, surface preparation and technique.
Is headlight polishing enough to prevent yellowing?
Not necessarily. Polishing can improve the surface finish but does not guarantee long-term UV resistance. A suitable protective system designed for the lens and restoration process is important.
Can every cloudy headlight be restored?
No. Exterior haze and oxidation may be suitable for restoration, but cracks, internal moisture, damaged reflectors and severe internal deterioration may require repair or replacement.
Does headlight restoration improve night-time visibility?
It can help when external lens haze is reducing light transmission. However, it cannot correct every cause of poor visibility. Bulbs, reflectors, wiring and beam alignment may also need inspection.
Where can detailers learn professional headlight restoration?
Detailers should look for practical training that covers lens inspection, abrasive selection, machine control, compound and pad selection, surface protection and final inspection. Contact AutoFresh to learn about its detailing training options.