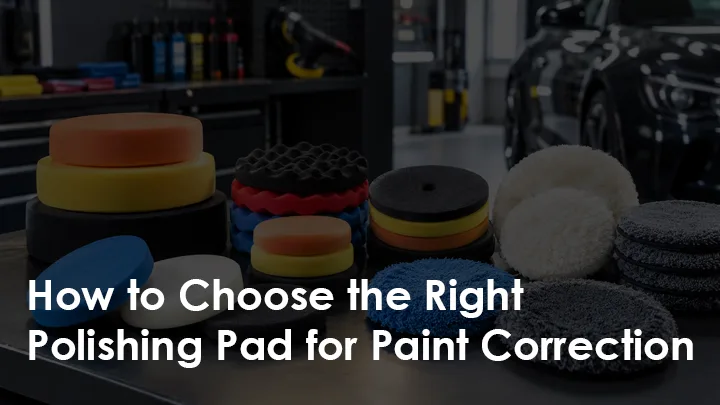
Choosing the right polishing pads is one of the most important steps in achieving a clean, glossy finish during car paint correction. The pad you use affects how quickly you remove scratches, how much heat you generate, how the compound behaves, and how much finishing work is required afterwards.
Many detailers select polishing pads based only on their colour or the compound they are using. However, pad colour is not standardised across manufacturers, and two pads with similar colours can have completely different cutting and finishing characteristics.
The right polishing pad depends on several factors, including paint hardness, defect severity, pad material, machine type, compound selection and the finish you want to achieve. Understanding these factors helps you choose the right combination, reduce unnecessary paint removal and improve the consistency of your results.
In this guide, we will explain how to select polishing pads for different paint correction jobs, compare foam, microfiber and wool pads, and discuss practical techniques that professional detailers can use to improve their workflow.
Why Does Choosing the Right Polishing Pads Matter?
A polishing pad transfers the movement of your polishing machine and the action of your compound or polish to the vehicle’s paintwork. The pad helps control how aggressively the abrasive product works against the surface.
Using a pad that is too aggressive can introduce haze, micro-marring or additional finishing work. On the other hand, a pad that is too soft may struggle to remove the defects you are trying to correct.
The correct pad helps you balance correction speed, surface finish and paint preservation.
Here are the main benefits of choosing the right pad:
- Better defect removal: The right pad and compound combination can remove suitable scratches, swirl marks and oxidation more efficiently.
- Improved finish: A suitable polishing or finishing pad helps reduce haze and refine the paint after cutting.
- Better process control: Matching the pad to the machine and paint condition makes the correction process more predictable.
- Reduced unnecessary paint removal: Starting with the least aggressive effective combination helps preserve the available clear coat.
- Consistent results: Proper pad selection and maintenance help achieve more uniform results across different panels.
Remember that polishing pads do not work independently. The compound, machine, paint condition, technique and working environment all affect the final result.
-
Understand the Three Main Types of Polishing Pads
Before selecting a polishing pad, understand the difference between cutting, polishing and finishing pads. These categories describe the pad’s general purpose, although the exact performance varies by manufacturer and product design.
Cutting Pads
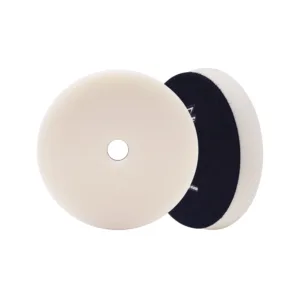
Cutting pads are designed for more aggressive paint correction. They are commonly used to remove heavier swirl marks, moderate scratches, oxidation and other defects that respond to abrasive correction.
These pads are generally firmer or more aggressive in construction, although cutting performance also depends on the foam structure, abrasive product and machine.
Best suited for: Paint with suitable defects that require stronger correction, after confirming that correction is safe.
Polishing Pads
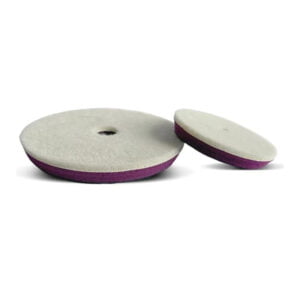
Polishing pads provide a balance between correction and finishing. They are useful for removing lighter swirl marks, refining the surface after cutting and improving gloss.
Depending on the combination, a polishing pad can sometimes remove moderate defects without requiring a separate heavy-cutting stage.
Best suited for: Light to moderate defects, one-step correction and refining paint after a cutting stage.
Finishing Pads
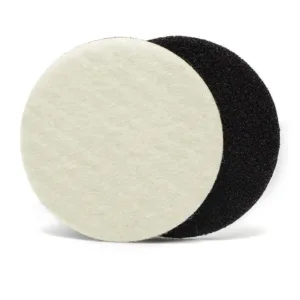
Finishing pads are designed for refining the paint surface and enhancing gloss. They are generally softer and less aggressive than cutting pads.
They are useful when the paint is already in good condition or when the previous correction stage has left a light haze that needs further refinement.
Best suited for: Final polishing, gloss enhancement and finishing before a suitable paint protection product is applied.
A common mistake is assuming every paint correction job needs all three pad types. Some vehicles can be corrected in one step, while others require multiple stages. Always evaluate the paint and perform a test spot before deciding.
-
Compare Foam, Microfiber and Wool Polishing Pads
Pad material affects cutting ability, finishing quality, heat management, product behaviour and maintenance. Each material has different strengths, so the choice should depend on the correction objective.
| Pad material | Typical characteristics | Common applications |
| Foam | Available in a wide range of firmness and cutting levels | Cutting, polishing and finishing |
| Microfiber | Often provides strong correction with suitable compounds on compatible machines | Removing heavier defects and refining certain finishes |
| Wool | Can provide high cutting ability, with performance varying by fibre and construction | More demanding correction, especially with compatible rotary systems |
Foam Polishing Pads
Foam pads are widely used because they are available in different densities, structures and cutting levels. They can be suitable for everything from aggressive correction to final finishing.
The type of foam, cell structure, firmness, pad thickness and face design all influence performance. A firm foam pad is not automatically the most aggressive, and a soft pad is not always the best finishing option.
Foam pads are a practical choice for detailers who want flexibility across different paint conditions and correction stages.
Microfiber Polishing Pads
Microfiber pads use short fibres to provide an abrasive working surface. They can deliver strong correction with the right compound and machine, particularly on compatible dual-action polishers.
However, microfiber pads can also leave haze or micro-marring on some paints, especially when used with an unsuitable combination or poor technique. They require regular cleaning to prevent spent product and paint residue from accumulating in the fibres.
Wool Polishing Pads
Wool pads can provide substantial cutting ability, particularly in demanding correction work. Their performance depends on the fibre type, pile length, pad construction, backing design and machine used.
Some wool pads are intended primarily for rotary polishers, while others are designed for dual-action machines. Always follow the pad manufacturer’s machine compatibility recommendations.
Practical tip: Do not choose a pad only because it is foam, microfiber or wool. Compare its intended cutting level, machine compatibility and finishing characteristics before using it on a vehicle.
-
Match the Polishing Pad to the Paint Defects
The next step is to identify the defects you need to correct. Different problems require different levels of correction, and some defects should not be treated with polishing alone.
| Paint condition | Starting approach |
| Light swirl marks | Polishing pad with a suitable finishing or medium polish |
| Light oxidation | Polishing pad and appropriate abrasive polish, after inspection |
| Moderate swirls | Medium-cut pad and compound, subject to a test spot |
| More pronounced scratches | Test a suitable cutting combination only after assessing paint condition |
| Haze after cutting | Refining pad with an appropriate finishing polish |
| Deep scratches | Assess depth and paint thickness before considering any correction |
The table provides starting points, not guaranteed solutions. A scratch that catches a fingernail may be too deep for safe machine polishing, although this simple test cannot reliably determine the actual depth of the defect.
Paint correction primarily works on the clear coat where one is present. Removing too much clear coat can compromise the paint system’s durability.
If the defect appears to reach the base coat, primer or metal, or the paint shows peeling, cracking or clear-coat failure, polishing is unlikely to be an appropriate repair.
-
Consider Paint Hardness Before Selecting a Pad
Paint hardness affects how easily a surface responds to a polishing combination. Some paint systems correct relatively easily, while others require more work to remove similar defects.
However, paint hardness cannot be reliably determined by vehicle brand, model or colour alone. Different manufacturers, model years, paint systems and repainting histories can produce different results.
For this reason, professional detailers should inspect the paint and perform a test spot rather than immediately choosing the most aggressive pad.
For softer paint
Softer paint may correct easily, but it can also show micro-marring or haze during aggressive polishing.
Start with a less aggressive pad and suitable polish. Check the result under appropriate inspection lighting before increasing the cutting level.
For harder paint
Harder paint may require a more effective cutting combination. A suitable microfiber or foam cutting pad paired with an appropriate compound may help, depending on the machine and the paint system.
Do not assume that more pressure or a more aggressive pad will always improve correction. Excessive pressure can reduce machine movement, increase heat and produce an inconsistent finish.
For repainted panels
Repainted panels require additional care because the paint thickness, curing history and paint system may differ from the factory finish.
Use a paint thickness gauge to identify unusual readings and variations where appropriate. However, a conventional gauge may measure the total coating thickness rather than the clear coat alone, and readings can be affected by the substrate and instrument type.
When paint condition is uncertain, use a conservative approach and seek professional assessment rather than attempting aggressive correction.
-
Choose a Polishing Pad Based on Machine Type
Your polishing machine influences how the pad performs. A pad that works well on one machine may behave differently on another.
Dual-Action (DA) Polisher
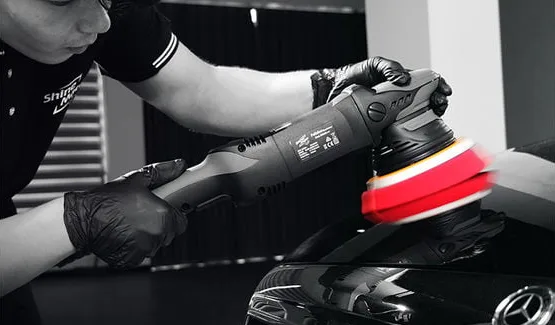
A DA polisher combines rotation with orbital movement. It is widely used for paint correction because it can perform a range of cutting and finishing tasks with appropriate pads and compounds.
For lighter defects, a polishing pad may be sufficient. For more demanding correction, a compatible cutting pad may be necessary.
Forced-Rotation Dual-Action Polisher
A forced-rotation machine drives the pad’s rotation mechanically. It can maintain rotation under load, depending on the machine design, and may provide more consistent correction in certain situations.
Pad compatibility, backing plate size and machine instructions remain important when choosing a pad.
Rotary Polisher
A rotary polisher rotates the pad around a fixed axis. It can provide strong cutting performance, particularly with suitable wool or foam pads, but it requires careful technique and heat management.
Incorrect use can cause excessive heat, visible defects or damage to the paint.
What About 8 mm, 15 mm and 21 mm Throw Sizes?
Throw size refers to the diameter of the orbital movement on an orbital polisher. It affects coverage, machine behaviour and access to different panel shapes.
A larger throw can be efficient on suitable broad panels, while a smaller throw may be easier to control in tighter areas. Actual correction performance also depends on machine power, pad size, paint condition and technique.
Important: Always use a pad and backing plate combination that is approved for your machine. Do not select a pad solely based on its diameter or advertised cutting ability.
-
Understand Pad Size, Shape and Construction
Pad size and construction affect how well you can control the machine and maintain contact with the surface.
A larger pad may cover broad panels efficiently, but it can be harder to control on narrow sections, curved panels and tight areas. A smaller pad can improve access, provided it is compatible with the machine and backing plate.
Consider the following factors:
- Pad diameter: Match the pad to the backing plate and machine specifications.
- Pad thickness: Different thicknesses can affect control, flexibility and heat behaviour.
- Pad shape: Flat, tapered and contoured pads can behave differently on curved panels.
- Edge design: The edge can affect access and control around panel contours.
- Centre hole: Some designs help with alignment or airflow, depending on the pad construction.
- Hook-and-loop backing: Check that the attachment system is secure and compatible.
Avoid using an oversized pad that extends beyond the backing plate or an incompatible pad that cannot be secured correctly.
-
Match the Pad With the Right Compound or Polish
The pad and abrasive product should be selected as a combination. A cutting pad paired with a finishing polish may not deliver the correction you expect, while a strong compound paired with an unsuitable pad can leave additional finishing defects.
Use the following framework as a starting point.
| Correction objective | Pad approach | Product approach |
| Heavy but safely correctable defects | Compatible cutting pad | Suitable cutting compound |
| Moderate swirls | Medium-cut or polishing pad | Medium-cut compound or polish |
| Light defects | Polishing pad | Fine abrasive polish |
| Final gloss refinement | Finishing pad | Finishing polish |
| Protection after correction | Clean, suitable application pad | Compatible wax, sealant or coating product |
These combinations are general guidelines. Some modern abrasive systems can produce strong correction with relatively fine finishing, while others need separate cutting and refining stages.
The most reliable way to determine the correct combination is to perform a controlled test spot.
Why the test spot matters
Choose a small, representative section of the panel. Start with the least aggressive combination that may achieve the desired result.
After the test section, remove residue using the product manufacturer’s recommended method and inspect the finish under suitable lighting. Check for remaining defects, haze and micro-marring.
If the result is insufficient, adjust one variable at a time. You might change the pad, compound, machine settings or technique rather than changing everything at once.
This approach helps identify an effective combination while avoiding unnecessary paint removal across the entire vehicle.
-
How to Clean and Maintain Polishing Pads
Even a correctly selected pad can deliver inconsistent results if it becomes loaded with compound, polish residue or paint contamination.
As the pad becomes saturated, its behaviour may change. Product can accumulate on the face, fibres can clump together, and correction performance may become less predictable.
Follow these maintenance practices during paint correction:
- Clean pads regularly. Remove accumulated residue according to the pad manufacturer’s instructions.
- Use an appropriate cleaning method. A pad-cleaning brush or compatible cleaning system can help remove residue from suitable pads.
- Inspect for damage. Stop using pads that are torn, delaminated, hardened or otherwise damaged.
- Avoid excessive product. Too much compound or polish can contribute to saturation and make cleaning more difficult.
- Use separate pads for different stages. Keep cutting, polishing and finishing pads organised to reduce cross-contamination.
- Allow pads to dry correctly. Follow the manufacturer’s instructions before storing or reusing washed pads.
Microfiber and wool pads may require more frequent cleaning because their working surfaces can hold residue differently from foam pads. The ideal cleaning frequency depends on the pad, product, paint condition and workload.
For professional studios, keeping several clean pads available can help maintain consistent performance throughout a correction job.
-
Common Polishing Pad Selection Mistakes
Avoid these common mistakes when choosing pads for paint correction.
Choosing by colour alone: Pad colour is not standardised across brands. Check the manufacturer’s description and intended use.
Starting with the most aggressive pad: Strong cutting can remove more paint than necessary and may create additional haze. Start conservatively and increase aggressiveness only when required.
Using the same pad for every stage: Cutting and finishing often require different pad characteristics. Using dedicated pads can improve consistency.
Ignoring paint hardness: Two vehicles with similar-looking defects may respond differently to the same pad and compound.
Applying excessive pressure: More pressure does not always improve correction. It can increase heat, interfere with pad movement and affect finishing quality.
Working with a saturated pad: Residue can affect cutting performance and finishing. Clean the pad as needed.
Ignoring paint thickness: Polishing removes some paint material. Inspect the panel and assess the available coating before attempting aggressive correction.
Failing to inspect the final finish: A panel can look glossy under general workshop lighting while still showing haze or micro-marring under focused inspection lighting.
-
A Practical Polishing Pad Selection Process for Detailers
Use this process as a starting point when planning a paint correction job.
01: Inspect the paint
Identify the type, severity and location of defects. Check for repainting, clear-coat failure and other warning signs.
02: Assess the coating
Use suitable inspection methods and a paint thickness gauge where appropriate. Do not assume that the gauge measures clear coat alone.
03: Choose a conservative combination
Select a compatible pad, compound and machine based on the paint condition and desired result.
04: Perform a test spot
Work on a small area, then inspect correction, haze and finish under suitable lighting.
05: Adjust if necessary
If the result is insufficient, change one variable at a time and retest before treating the full panel.
06: Refine and protect
Use a suitable finishing stage when needed, remove residues appropriately and apply the selected protection product.
This workflow helps professional detailers make decisions based on the actual paint condition instead of relying on fixed pad and compound combinations.
Frequently Asked Questions
Which polishing pad is best for removing scratches from a car?
The best pad depends on scratch depth, paint hardness, machine type and compound selection. A suitable cutting pad may help remove shallow, correctable defects, while deeper scratches may require a different repair approach. Start with a test spot and avoid aggressive polishing when paint condition is uncertain.
What is the difference between a cutting pad and a polishing pad?
A cutting pad is generally designed for stronger defect removal, while a polishing pad balances correction with surface refinement. The exact difference depends on the pad material, construction and manufacturer.
Are foam polishing pads better than microfiber pads?
Neither is universally better. Foam pads offer a broad range of cutting and finishing characteristics, while microfiber pads can provide strong correction in compatible systems. The appropriate choice depends on the paint, abrasive product, machine and desired finish.
Can I use the same polishing pad for compound and polish?
It is generally preferable to use separate pads for cutting and finishing. This reduces product cross-contamination and makes it easier to control the correction process. If you reuse a pad, it must be thoroughly cleaned and suitable for the next product, but dedicated pads are often more practical.
How often should I clean a polishing pad?
Clean the pad whenever it becomes loaded with residue or its performance changes. The frequency depends on pad material, product, paint condition and working technique. Follow the manufacturer’s cleaning instructions.
Does pad colour indicate its cutting power?
No universal colour system exists across polishing pad manufacturers. Always refer to the manufacturer’s specifications instead of assuming that a particular colour means cutting, polishing or finishing.
How many polishing pads do I need for a full car?
The number depends on vehicle size, paint condition, correction stages, pad material and cleaning arrangements. For professional work, having multiple clean pads available for each stage helps maintain consistent performance and reduces interruptions.
Can the wrong polishing pad damage car paint?
Yes. An unsuitable combination, excessive pressure, poor technique or prolonged work can cause haze, micro-marring, excessive heat or unnecessary paint removal. Correct pad selection, inspection and test spots help reduce these risks.
Conclusion
Choosing the right polishing pad for paint correction requires more than selecting a particular colour or material. You need to consider paint hardness, defect severity, pad construction, machine compatibility, compound selection and the finish you want to achieve.
Start with the least aggressive combination likely to work, perform a test spot, inspect the result and increase cutting power only when necessary. Keep pads clean, use compatible equipment and pay attention to paint thickness and condition.
For professional detailers, a well-planned pad selection process can improve correction consistency, reduce unnecessary work and help achieve a refined finish across different vehicle paint systems.
Explore AutoFresh’s polishing pads, compounds, polishes and car polishing machines to build a suitable paint correction setup for your detailing requirements.